
Sadly, summer is coming to an end. But, because of this, I am making a special deal on my kayaks! As of today, the price will be $15/kayak for a trip instead of $20. This means taking that new girl out on a date just became affordable!
The price will remain the same for insurance and transportation.
Showing posts with label Info. Show all posts
Showing posts with label Info. Show all posts
Friday, August 13, 2010
Tuesday, July 21, 2009
Specifications
I realized it might be a good idea to put more info on the actual specifications of the kayaks up here on this blog. These kayaks were made from a mold taken from the Old Town brand Otter kayak. The dimensions and specifications for that kayak can be found here.
Length...............9'6"
Width.................28.5"
Depth.................12"
Weight...............One is 30lbs, the other is 40lbs
Max Capacity...275lbs
They are made from chopped fiber sprayed into the mold with a white gel coat paint for the shell. The first one I made was made with a group of scouts. Because of this the fiberglass was laid up 0.120" thick. This was way thicker than it needed to be mostly because scouts tend to use their kayaks rougher. When I made the second I made it 0.080-0.090" thick. This made it 10lbs lighter and still plenty strong enough for the times I treat it rough.
After the shell was laid up I took the top and bottom pieces and using a roofing silicone I bound them together. Then I used regular Bondo to cover the seam between the two. This is the strip of off white color you can see in the pictures. This process has weathered great, but I can see that there are better ways I could do it, and will do it in the future. I plan on taking the bondo off at some point and replacing it with a fiberglass strip which would completely hide the seam making the kayak essentially one piece in the end, for example.
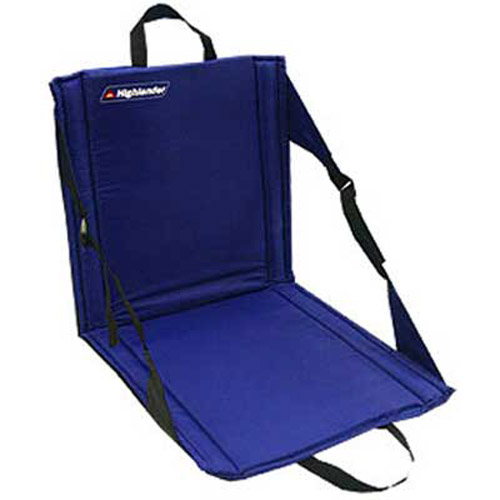
I am on my third type of seat now. First was a piece of packing Styrofoam like you would find in a computer box or something. Second was an open cell Styrofoam-not sure what it was used for, but I wrapped it in Saran wrap and it has worked great. One of each of these has been lost, but I just bought a new seat as a replacement. It is one of those camping seats that is just a back and seat strapped together like this one, but not this brand. We will see how comfortable it is, but even if it is not, I still have the old ones.


Length...............9'6"
Width.................28.5"
Depth.................12"
Weight...............One is 30lbs, the other is 40lbs
Max Capacity...275lbs
They are made from chopped fiber sprayed into the mold with a white gel coat paint for the shell. The first one I made was made with a group of scouts. Because of this the fiberglass was laid up 0.120" thick. This was way thicker than it needed to be mostly because scouts tend to use their kayaks rougher. When I made the second I made it 0.080-0.090" thick. This made it 10lbs lighter and still plenty strong enough for the times I treat it rough.
After the shell was laid up I took the top and bottom pieces and using a roofing silicone I bound them together. Then I used regular Bondo to cover the seam between the two. This is the strip of off white color you can see in the pictures. This process has weathered great, but I can see that there are better ways I could do it, and will do it in the future. I plan on taking the bondo off at some point and replacing it with a fiberglass strip which would completely hide the seam making the kayak essentially one piece in the end, for example.
I am on my third type of seat now. First was a piece of packing Styrofoam like you would find in a computer box or something. Second was an open cell Styrofoam-not sure what it was used for, but I wrapped it in Saran wrap and it has worked great. One of each of these has been lost, but I just bought a new seat as a replacement. It is one of those camping seats that is just a back and seat strapped together like this one, but not this brand. We will see how comfortable it is, but even if it is not, I still have the old ones.
Friday, May 29, 2009
Atlantic Kayak Tours
I found this website today with tons of great info on kayaking skills, boat types, and safety procedures. One of the best things I learned from them is that I do not want to put new high back seats into my kayaks. This quote is from their buying a kayak guide.
So instead I am considering a Velcro strap to attach the Styrofoam seat to the boat.
In other news, I have just repaired the kayak tips so they have a nice round nose on both ends. It is just another step closer to painting them. My sister and brother in law rented them for this weekend and will be taking them up to Tibble Creek Res. in American Fork canyon. It is great to finally be sending them out! Have fun guys!
"Some kayaks are sold with a real seat, that has a real back, like a chair. It makes a boat look seductive in the showroom, but unless you can make a deal with God that you'll never, ever capsize, it's not a feature you want. A seat that sticks up higher than the cockpit rim makes it significantly harder to get back in your boat after a capsize - whether you're doing a self-rescue or getting help from someone else. If the boat of your dreams has a chair back to its seat, have the dealer replace it with a low back-band."
So instead I am considering a Velcro strap to attach the Styrofoam seat to the boat.
In other news, I have just repaired the kayak tips so they have a nice round nose on both ends. It is just another step closer to painting them. My sister and brother in law rented them for this weekend and will be taking them up to Tibble Creek Res. in American Fork canyon. It is great to finally be sending them out! Have fun guys!
Friday, May 8, 2009
Welcome
This blog is for posting pictures and stories of kayaking adventures on Utah Lake, the Provo River, and anywhere else my home-made kayaks have been. If you have any good stories or pretty pictures from your adventures please send them to me and I would be glad to post them here.
Subscribe to:
Posts (Atom)
